Drywall Sander Guide: How to Choose the Right One for a Flawless Finish
Discover the best drywall sander for your needs! Learn about manual, electric, and vacuum sanders, plus tips for achieving a smooth, dust-free finish every time.
TOOLS
DRZ
2/2/20255 min read
Why Choosing the Right Drywall Sander Matters
Sanding drywall might not be the most glamorous part of a renovation or repair project, but it’s undoubtedly one of the most important. A smooth, flawless finish can make all the difference in the final look of your walls or ceilings. However, with so many types of drywall sanders available, it can be overwhelming to know which one is right for your project.
Whether you’re a DIY enthusiast tackling a small repair or a professional contractor working on a large-scale job, choosing the right sander can save you time, effort, and frustration. From manual sponges for quick touch-ups to electric sanders with dust collection systems for big projects, each tool has its strengths and ideal uses. In this guide, we’ll break down the different types of drywall sanders, their pros and cons, and how to choose the best one for your needs. Let’s dive in and make your sanding process smoother than ever!
1. Manual Drywall Sanding Sponges
Description: These are handheld sponges with an abrasive surface, often used for small repairs or finishing touches. They come in various grits and can be used for both dry and wet sanding.
Pros:
Inexpensive and easy to use.
Great for small areas, corners, and tight spaces.
Can be used for wet sanding to minimize dust. But I find this tends to gum up quickly and easier to use a actual "wet sanding sponge" (see below)
Cons:
Labor-intensive for large projects.
Not as efficient for smoothing large surfaces.
Best For: Small repairs, touch-ups, and detailed work.
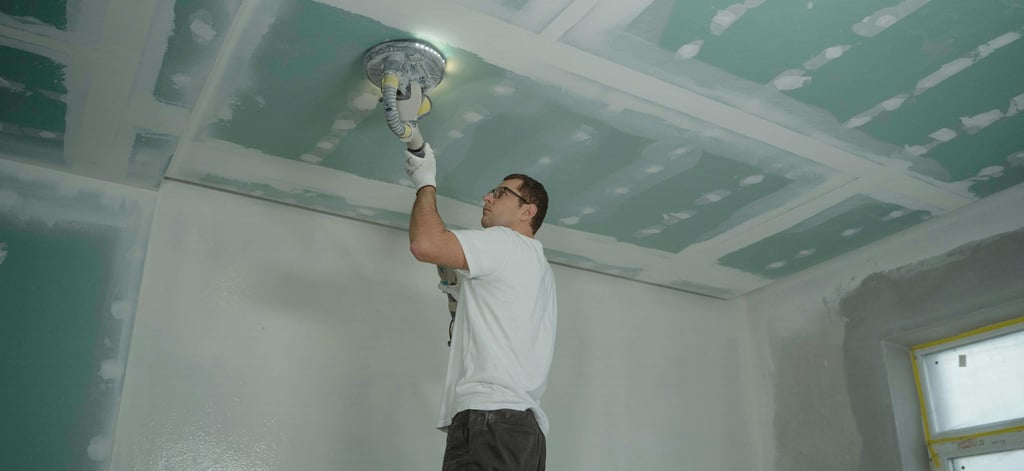
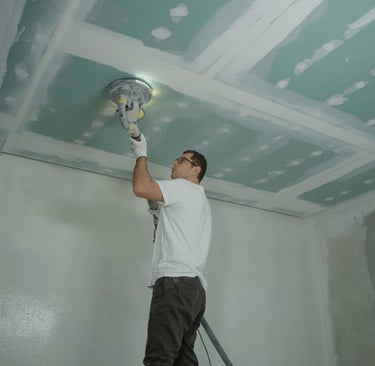
2. Pole Sanders
Description: Pole sanders feature a sanding head attached to an extendable pole, allowing you to reach ceilings and high walls without a ladder. The sanding head typically uses sandpaper or a mesh screen.
Pros:
Reduces the need for ladders, making it safer and easier to sand ceilings.
Covers large areas quickly.
Lightweight and easy to maneuver.
Cons:
Can be tiring to use for extended periods.
Less precise than handheld sanders for detailed work.
Best For: Ceilings, high walls, and large flat surfaces.
3. Electric Drywall Sanders
Description: Electric drywall sanders are power tools designed specifically for drywall work. They come in various styles, including rotary, orbital, and disc sanders. Many if not most models feature dust collection systems to minimize mess.
Pros:
Highly efficient for large projects.
Dust collection systems reduce cleanup and health risks.
Provides a smooth, even finish with less effort.
Cons:
More expensive than manual options.
Can be bulky and harder to control for beginners.
Best For: Large-scale drywall projects, such as new construction or full-room renovations.
4. Drywall Sanding Screens
Description: Sanding screens are abrasive mesh sheets that can be attached to manual or pole sanders. They are lightweight and allow dust to pass through, reducing clogging.
Pros:
Lightweight and easy to handle.
Resists clogging, making it more efficient than traditional sandpaper.
Works well for both dry and wet sanding.
Cons:
Less durable than sandpaper.
May not be as effective for heavy sanding tasks.
Best For: Medium-sized projects and finishing work.
5. Corner Sanding Tools
Description: These specialized tools are designed to sand inside corners and tight spaces. They most often feature triangular or angled heads to fit into corners easily.
Pros:
Good for hard-to-reach areas.
Lightweight and easy to use.
Available in manual and electric versions.
Cons:
Manual versions I find it just as easy to fold a piece of sand paper in half in my opinion.
Not suitable for large flat surfaces.
Best For: Sanding inside corners, edges, and detailed areas.
6. Wet Sanding Sponges
Description: Wet sanding sponges are used with water to smooth drywall compound without creating dust. They are often made of foam or rubber with an abrasive surface.
Pros:
Dust-free, making it ideal for occupied spaces.
Easy to use and clean.
Provides a smooth finish with minimal effort.
Cons:
Requires frequent rinsing to remove compound buildup.
Not as effective for heavy sanding tasks.
Best For: Small repairs, touch-ups, and dust-sensitive environments.
A Few Drywall Sander Brands and Models We're Familiar with.
Here are some of the most trusted brands and their standout models:
1. Manual Sanding Sponges (Dry)
3M SandBlaster Sanding Sponges:
Why They're Great: Durable, versatile, and available in multiple grits. Perfect for small repairs and wet sanding.
Best For: Touch-ups, corners, and detailed work.
Hyde Tools Contour Sanding Sponge:
Why It’s Great: Ergonomic design with a contoured edge for corners and curves.
Best For: Tight spaces and curved surfaces.
2. Pole Sanders
Wal- Board (Brand) Drywall Pole Sander:
Why It’s Great: Affordable and lightweight, with an adjustable pole for ceilings and high walls.
Best For: DIYers and small to medium projects.
Radious360 Drywall Pole Sander:
Why It’s Great: Heavy-duty construction with a swivel head for better control. Suitable for rounded surfaces and avoids flipping or scratching.
Best For: Professionals with medium and large-scale projects.
3. Electric Drywall Sanders/ Vacuum-Attached
DEWALT Drywall Sander (Cordless) (DWE6423):
Why It’s Great: Powerful, with a dust-sealed switch and variable speed control. Includes a vacuum adapter for dust collection.
Best For: Large projects and professionals.
Wen Handheld Drywall Sander with Dust Hose and Collection Bag:
Why It’s Great: Lightweight and easy to maneuver, with a dust collection port.
Best For: Medium to large projects and DIYers.
Reversible auxiliary handle for left- and right-handed users
Hook and loop sander base for easy sandpaper installation
Includes dust hose, dust bag, shoulder strap
Techniques for Using Drywall Sanders Effectively
Here are some pro tips to help you get the best results:
1. Start with the Right Grit
Coarse Grit (80-120): Use for initial sanding to remove high spots and excess compound.
Medium Grit (150-180): Ideal for smoothing surfaces and preparing for finishing.
Fine Grit (220+): Use for final sanding to achieve a polished, paint-ready finish.
2. Use a Light Touch
Avoid pressing too hard on the sander, as this can create uneven surfaces or damage the drywall. Let the tool do the work.
3. Work in a Circular Motion
For manual and electric sanders, use circular motions to evenly distribute pressure and avoid creating grooves or scratches.
4. Keep the Surface Clean
Regularly wipe away dust with a damp cloth or use a vacuum-attached sander to maintain visibility and ensure a smooth finish.
5. Wet Sanding Tips
Use a damp sponge or wet sanding tool for dust-free sanding. Wring out excess water to avoid oversaturating the drywall.
Rinse the sponge frequently to remove compound buildup and maintain effectiveness.
6. Sand Between Coats
Lightly sand between coats of drywall compound to remove imperfections and create a smooth surface for the next layer.
7. Protect Yourself
Wear a dust mask, safety goggles, and gloves to protect yourself from dust and debris, especially when dry sanding.
How to Choose the Right Drywall Sander
Project Size: For small repairs, manual sponges or wet sanding tools are ideal. For large projects, electric sanders or pole sanders are more efficient.
Dust Control: If dust is a concern, opt for vacuum-attached systems or wet sanding tools.
Budget: Manual sanders are the most affordable, while electric and vacuum systems are more expensive but offer greater efficiency.
Skill Level: Beginners may prefer manual or pole sanders, while professionals might invest in electric or vacuum systems.
Final Thoughts:
Choosing the right drywall sander can save you time, effort, and frustration on your project. Whether you’re a DIY enthusiast or a professional contractor, there’s a sander out there to meet your needs. From manual sponges for small touch-ups to electric sanders with dust collection for large-scale jobs, the right tool can make all the difference in achieving a smooth, professional finish.
The Drywall Resource
Expert advice for drywall enthusiasts and contractors.
© 2025. All rights reserved.

